Posts

Showing posts from October, 2023

Recipe: Rocky Road Ice Cream

Image
 This is my version of rocky road ice cream. Rocky Road Ice Cream: 4 1/2 cups (1 L) chocolate ice cream 1 cup (140g) whole almonds 1 cup (60g) mini marshmallows 1 cup (200g) chocolate covered peanuts (optional) I have to comment about the chocolate covered peanuts. I remember them being in rocky road ice cream, but in researching it I found out that they are not classic to the recipe, so evidently it was just the brand that I had as a child. I will include them just because I remember them in it. But you can completely leave them out for a more classic recipe. Allow ice cream to sit at room temperature for 1 hour or microwave it for 1 minute. Stir until ice cream is soft, but not runny.  Stir in almonds, marshmallows and chocolate covered peanuts.  Freeze for two hours. Stir to make sure all the ingredients haven't sunk to the bottom.  Freeze for at least 4 hours over overnight is better. Watch us make this simply delicious recipe on our YouTube channel here: https://youtu.be/NaVlb

Rainbow Butterfly Cake

Image
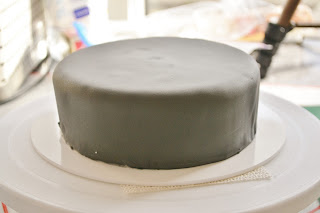
 For this cake I had a vision of a rainbow of butterflies covering a cake. I started out frosting a 6 and 4-inch cake dummy with vegan American buttercream and covered both tiers in black fondant. Then I stacked the tiers. Then I cut out a whole bunch of butterflies out of every color of the rainbow. I started placing the yellow in the middle and moved in both directions from there to complete the rainbow. But I love this cake. It's so colorful and just brings a smile to your face. I actually think that the colors look brighter on the black background. Watch us make this colorful cake on our YouTube channel here: https://youtu.be/yTz40Aa404Y Schaut zu wie wir diese bunte Torte auf unserem YouTube Kanal machen hier: https://youtu.be/Q0ajvHCmtKA

Recipe: Mint Chocolate Chip Ice Cream

Image
 I've decided to start a new series on easy alterations of either vanilla or chocolate ice cream. One of our favorites? Mint chocolate chip. Let's start there. Mint Chocolate Chip Ice Cream: 1 L (4 1/2 cups) vanilla ice cream 1 1/2 cup (200g) chocolate chips 1 tsp mint flavoring turquoise food coloring (optional) Begin by allowing the ice cream to sit out long enough to get soft. I will emphasize you want soft ice cream, not runny. Either an hour at room temperature or 1 minute in the microwave.  Stir in the mint flavoring and turquoise food coloring until well combined.  Fold in the chocolate chips.  Pour back into the container the ice cream came in.  Return to freezer. Freeze about 2 hours. Then stir to make sure the chocolate chips haven't all sunk to the bottom.  Then allow to freeze completely. At least 4 hours. This tastes very similar to mint chocolate chip ice cream and the vanilla really doesn't come through. Watch us make this easy recipe on our YouTube chann

Stained Glass Cake

Image
 I've decided to make a cake out of the hard candy we made last week. I started out with a 6-inch cake dummy frosted with vegan American buttercream. And I'm using the homemade hard candy from last week.  broke it in pieces and placed it in groups of colors around the cake. I used green, blue, purple and red hard candy. But doesn't it look cute? I love how it looks and it was really easy to make. Watch us make this easy cake on our YouTube channel here: https://youtu.be/neju4o2M3J4 Schaut zu wie wir diese leichte Torte auf unserem YouTube Kanal machen hier: https://youtu.be/tziJeYPeg_s

Recipe: Hard Candy

Image
 This is a pretty simple recipe for homemade hard candy. Hard Candy: 4 cups (800g) sugar 2 cups (500mL) water food coloring or flavoring as desired Prepare a surface with aluminum foil dusted with powdered sugar. Or you can use wax paper or baking paper. If you want to use flavors or colors, prepare them beforehand. Mugs work great for this. Then, in a saucepan, combine water and sugar. Heat over high heat and allow to boil until sugar syrup reaches hard crack. Keep a cup of cold water next to it to test the sugar syrup with. Stir at the beginning to combine the sugar and water, but do not stir after the syrup begins to boil. When you reach the right stage, remove from heat. Pour in prepared cups with colors or flavors or simply pour over prepared surfaces. Allow to cool completely. It should be easy to pick up. Break in pieces. These are easy to color and don't need much flavorings either. Watch us make this simple recipe on our YouTube channel here: https://youtu.be/EnELgMdTepM S