Recipe: Vanilla Cookie Cutouts
This recipe was one I adapted from someone else's recipe. It works perfectly to make stable vanilla-flavored cut out cookies. I actually don't call these sugar cookies simply because there's not that much sugar in them compared to most "sugar" cookie recipes. I feel sugar cookies are more about the taste and vanilla cookie cut outs are more about stability and the ability to cut them out in any shape you need.
So, now that I've thoroughly confused everyone reading this, here's my recipe:
Vanilla Cookie Cut-outs:
3 cups (375g) flour
1/4 tsp salt
1/4 tsp baking soda
1 cup (250g) butter
1 cup (200g) sugar
1 egg
1 tsp vanilla extract or 1 tbsp vanilla sugar
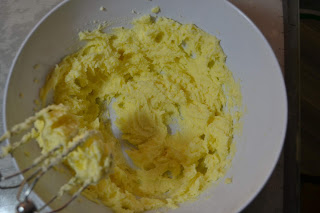
 First, cream your butter until soft and creamy.
 Then add the sugar.
 And the egg and vanilla.
 Then add the dry ingredients, half at a time.
 When you add the second half, the dough will be quite dry. Finish it up by kneading in the last of the flour by hand. The dough should look something like this. If it's not separating from the sides of the bowl, add an additional quarter cup of flour.
 Now, most cut out cookie recipes will now tell you to chill the dough. This step annoys me to no end. I hate chilling my dough. I'm too impatient for that. I making cookies. Not petit fours or French macarons. I shouldn't have to chill my dough. So, I've come up with an alternative to chilling the dough. I roll out the dough on parchment paper instead of a floured surface. I only rub a bit of extra flour on the rolling pin to keep it from sticking to the dough.
 I roll out the dough about a quarter of an inch thick and use cookie cutters to cut out the dough, keeping it completely on the parchment paper. This project was for my daughter's Harry Potter themed birthday party. You can keep the cut outs fairly close together, but they shouldn't be touching.
 Now, instead of trying to pick up the cut outs, try not to touch the cut outs as much as you can. Instead, remove the excess dough from the between the cut outs and since we didn't use much flour, it's easy to reuse the dough the next time.
 Now, pick up the whole piece of parchment paper and place it on a baking tray and bake it in the oven at 325°F or 160°C for 8-10 minutes.
 While the first batch are baking, you can get a second piece of parchment paper and roll out some more cookies.
 Watch the cookies closely the last minute or two. They should no longer be shiny on top. These need another minute or two.
 And the thinnest edges should just be starting to turn golden brown. These are now done.
 Then, instead of taking the cookies off the baking tray with a spatula, I just remove the entire piece of parchment paper. Then I put the second piece onto the baking tray and put it back in the oven for the second batch. This technique keeps it going on a conveyor belt kind of a speed. Cookies are always in the oven until you're completely finished.
 Once the cookies have cooled for a minute or two, you can remove them from the parchment paper without any problems. Then you can use the same piece of parchment paper to roll out some more cut outs.
 These are very stable as far as size and shape. They do rise a very little bit, so if it is absolutely essential for your design to not rise, then I would suggest chilling the cut outs in the fridge for an hour before trying to bake them up. This will stabilize the butter and keep it from spreading.
 The recipe is stable enough to make a gingerbread house out of, in my opinion. Yet I still love eating them, as well.
 When I get down to the last dredges of the dough and I can't get any more cut outs out of it, I roll it into small balls and press them onto the parchment paper with my fingertips.
 These are perfect for decorating with royal icing.
 My daughter's girly Harry Potter party is set up.
 Watch us make these on our YouTube channel here: https://youtu.be/pcxDQo45b6A
Schaut zu wie wir sie auf YouTube machen hier: https://youtu.be/bkxLrSK-MYo
So, now that I've thoroughly confused everyone reading this, here's my recipe:
Vanilla Cookie Cut-outs:
3 cups (375g) flour
1/4 tsp salt
1/4 tsp baking soda
1 cup (250g) butter
1 cup (200g) sugar
1 egg
1 tsp vanilla extract or 1 tbsp vanilla sugar


Schaut zu wie wir sie auf YouTube machen hier: https://youtu.be/bkxLrSK-MYo


Comments
Post a Comment