Tutorial: How to Make a Checkerboard Cake
There's nothing that says that you spent a great deal of time on a cake than a design on the inside. One of the easiest versions of this is the checkerboard cake. Let me show you how to make it.
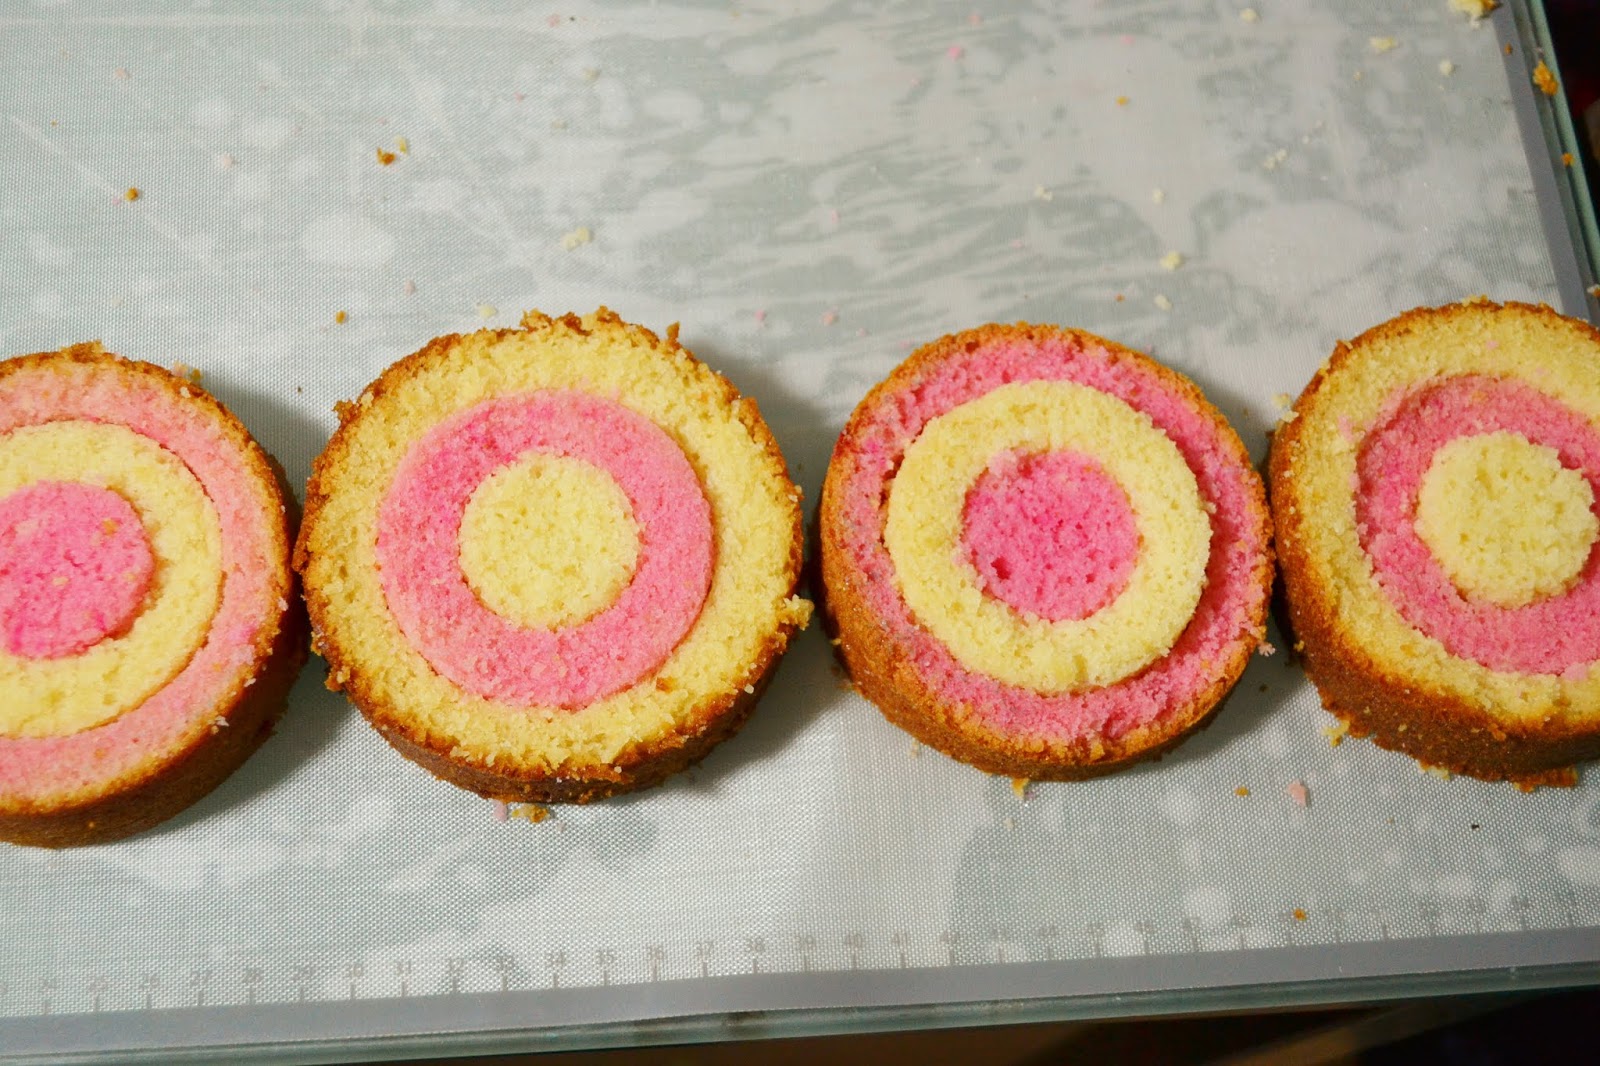
A checkerboard pattern is not obvious without at least three layers. Four is better. Or even taller. You will need at least two different colors of cake. The colors should be different enough that you can see the different colors when they're next to each other.
 The hardest part is figuring out the sizes of the rings. Start with the base of the size of the cake. Take the size of cake you baked and divide it by 3. That's the smallest size you need. Then take that number and multiply it by 2 to get the middle size.
A checkerboard pattern is not obvious without at least three layers. Four is better. Or even taller. You will need at least two different colors of cake. The colors should be different enough that you can see the different colors when they're next to each other.

This is four inch round cake. I originally picked out a three inch circle cutter and a one and three-quarter inch circle cutter. However, when I laid it on the cake, the larger size was obviously too large. The outer ring would have been just the tiniest sliver. This happens because of the contracting of the cake away from the sides of the pan when it bakes. I baked the layers in a four-inch pan, but they were really closer to 3 1/2 inches in diameter.
 So, let's try again! This is a 2 1/2 inch circle cutter and a just over one inch large piping tip. When I laid them on the cake, it was clearly a better fit.
 So, I pressed the two cutters into the cake just a bit and used my knife to cut all the way through the layers of cake. I would never recommend using a back of a piping tip as a cutter into cake because as you go down the piping tip, it gets narrower.
 After I cut all the way through the cake layers, I gently pulled them apart and laid them out separately on the table.
 Now, alternate your colors of cake. If your outside ring is pink, the next color should be white and then pink on the inside.
 Now, the only thing you need to be careful of is to alternate colors as you're staking the cake. So, as I was stacking, I started with white on the outside then pink, then white, then pink.
 I also used a thin layer of buttercream between the layers. Be careful here with the buttercream. You don't want a super thick layer of filling between the layers because that would mess up the visual picture you're trying to create.
 But look how gorgeous the squares look. The squares are actually an optical illusion, as you made them by cutting rings. However, from the middle looking out, you can see what appear to be squares, which is where this cake got its name.
 Look how fun it looks from the front.
 Happy Baking!
 Watch us make this cake on YouTube here: https://youtu.be/pchmHSsG8dE
Schaut zu wie wir diesen Kuchen auf YouTube machen hier: https://youtu.be/XLVocnTF4Bo


Schaut zu wie wir diesen Kuchen auf YouTube machen hier: https://youtu.be/XLVocnTF4Bo


Comments
Post a Comment